Music Theory Beginner A – Lesson 1

The Ultimate Music Theory Beginner A, B and C Workbooks provide Innovative Teaching Techniques for young musicians to learn Theory Foundation concepts, and Sight Reading & Ear Training Skills. In the Beginner A Lesson 1 Blog, I will share ideas from my own teaching experiences with my students as we explore Lesson 1 - Fingers and Directions.
The Ultimate Music Theory Beginner A Workbook is designed to be used with all Beginner Music Students (no matter what Method Series you use). In this Workbook, Teachers will have the resources to make learning Theory, Sight Reading and Ear Training exciting, educational and fun for Students!
At the very first Piano Lesson, use the Beginner A Workbook with your Piano Course/Method of choice. It doesn't matter what Method Series you use to teach Piano, the Ultimate Music Theory Beginner A Workbook will support your Teaching.
Music Theory Beginner A - Lesson 1
If you have never had a Student get confused between their Right Hand and their Left Hand, or which finger is finger #1, then you are either super lucky or you haven't taught for long enough.
A little bit about me... My students call me "Mme. Shelagh" (Madame Shelagh, Shelagh is pronounced like "Sheila", just spelled the Gaelic way). I love teaching beginner students and students with special learning needs. I struggle with dyslexia and dyscalculia myself (words, letters and numbers get REALLY mixed up between what I see and what I say). So my goal has always been to make music (and especially theory) a positive experience for students.
I also have degenerative Osteoarthritis, so I teach with compression gloves on my hands to help keep the circulation going (and the joints from swelling so much that they freeze). In any videos in this Ultimate Music Theory Beginner A Lesson Blog, you may see these gloves on my hands. No worries! I just do what I need to do in order keep on teaching.
My students love making "teaching videos" with me, and taking "teaching pictures". We post them on my Studios Facebook Page (Mme. Shelagh's Studio Page) so that parents and other teachers can share in our fun lesson time. These videos are not planned or edited - what you see is what actually happens at our lesson. (And I have Media Permission for any Student featured in any picture or video.)
Therefore, this Blog is based upon what I am experiencing as a "real life" teacher of "real life" students. I hope that you enjoy the tips that I will share to give you ideas on how you too can bring Theory to life for your young students.
I'd also like to note that I use the Music Theory Beginner A Workbook with ALL my beginner (and "first year") students, from 4 years of age right through to my new adult beginners. When they get their Beginner Method Books, they also get their Music Theory Beginner A Workbook. And WOW, is this ever making a difference in the quality of their music!
So, are you ready to explore Music Theory Beginner A Lesson 1? I sure am!
Music Theory Beginner A Lesson 1 - Right Hand and Left Hand

In my 40+ years of teaching, I have had many students who struggle with quickly identifying their Right Hand and their Left Hand. And, being dyslexic, I have often found myself struggling with this concept too.
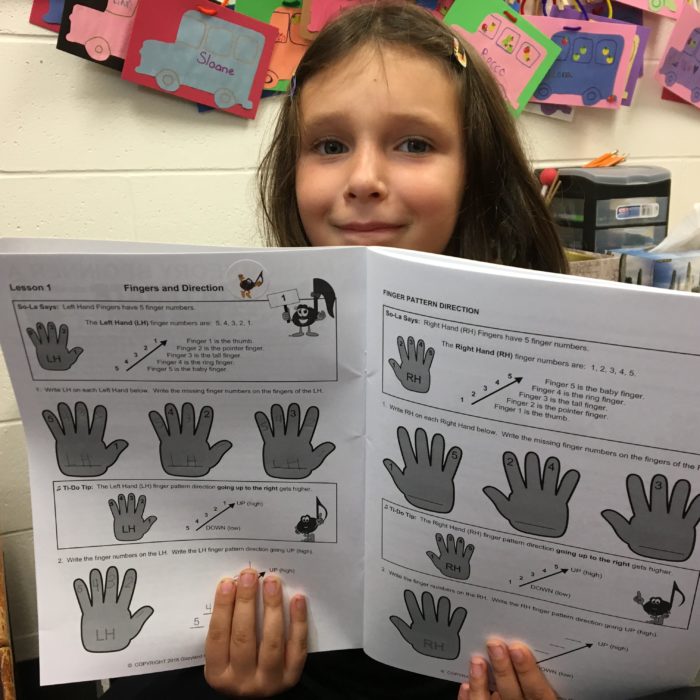
The Beginner Music Theory Level 1 Workbook starts with an introduction to the Right and Left Hands, and the finger numbers of each hand. This is important as it connects students with where "making music" starts - the hands!
So, make completing these pages a HANDS ON activity! Use the So-La and Ti-Do Stuffies to bring these pages to life with your students.
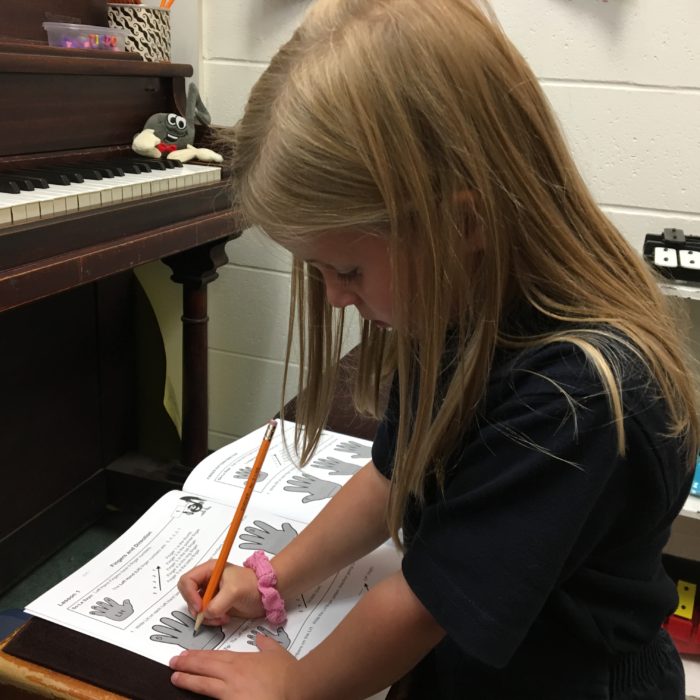
Every time we write an "RH" or "LH" on the pages 4 and 5, the student puts their correct hand on the page AND they help So-La or Ti-Do put THEIR correct hand on the page. Did you notice that our So-La and Ti-Do Stuffies actually do have 5 fingers on each hand!
You may also note that the Left Hand Page activities are on the Left Page, and the Right Hand Page activities are on the Right Page. This is a subtle reinforcement of Left and Right for students who struggle with quick identification.
I also have my students do these activities with their books on the piano bench so that they are facing the piano.
You can complete the first "hand" exercise with the student at the lesson and then they can finish the writing at home. You can complete ALL the exercises at the lesson with the student. OR you can simply assign the work to be completed at home (which I often do for my older beginner students). Do whatever works for you and the student.
Music Theory Beginner A Lesson 1 - Finger Numbers, Going Up High and Going Down Low (Pattern Direction)
Going up (getting higher) and going down (getting lower) can be tricky for students. Children are not born with the ability to understand that sounds can ascend (get higher), descend (get lower) or stay at the same pitch. This is why early childhood music, or singing to your child, is so important!
I've noticed in my studio that some students think that going up high only happens at the top right of the piano, and going down low only happens at the bottom left of the piano. (Just like they often say that a loud sound is a low sound and a high sound is a soft sound.)
This concept of Pattern Direction is also confusing as students read the music from right to left, but they PLAY notes that go down lower by playing "to the left" and they PLAY notes that go up higher by playing "to the right".
On pages 6 and 7, we introduce the concept of Pattern Direction using our UMT Stairs. Stepping UP (high) stairs ascend and stepping DOWN (low) stairs descend. Students are still reading (or tracking) the exercises moving their eyes from right to left, but they begin to also see, hear and feel the different directions of the sound.
Did you also notice the "tip" that I used with Lydia when she was confused with which finger was Finger #1? We do a little chant "We're Number 1", holding our thumbs up in the air. If you do this holding Finger #5 in the air, students see that it looks silly. This reinforces that our thumbs are number 1!
I like to do the first couple of examples on each page in the Music Theory Beginner A Lesson 1 with each student at the lesson. As you can hear in this video, Karrington and I are also matching the directions of pitch with our voices. (And you do not have to be a singer or be "on pitch" - just sing so that the pitch is going in the correct direction.)
We will also repeat the same exercise in different spots (different pitches) on the piano so that the students associate direction with ANY pitch (and not get confused that going down is always with LOW notes, and going up is always with HIGH notes).
Understanding that low notes can get higher in pitch and high notes can get lower in pitch is an important step in developing Ear Training skills.
Music Theory Beginner A Lesson 1 - Review
Pages 8 and 9 are the Lesson 1 Review Pages. These are not "test" pages, and no mark is assigned. I tell my students that a "Review" page is just "reviewing" what we learned so if they are not sure of an answer, they can look back to find it. Reviewing is simply Reinforcing what we learned.
Page 8 can be completed at the lesson or at home by the student. Page 9 is our first Music Theory Beginner A Lesson 1 Sight Reading & Ear Training Games Page and it is to be completed at the lesson with the Teacher.
I put the Workbook on the piano bench and then have the students turn away so that they are listening (without seeing the keyboard). After I play each going up or going down game, we circle the correct answer in the workbook.
We then PLAY (or tap) what we heard so that the student makes the connection between what they see, hear and play.
Another fun game is to complete the first couple of exercises with the student, and then have the STUDENT be the Teacher for the final exercise. The Student sits at the piano and gets to pick whether they are playing "down" or "up" and the Teacher gets to circle the correct answer. My students just love "being the Teacher" and trying to "trick" me.
Music Theory Beginner A Lesson 1 - Stickers

Students of all ages love stickers. Even my 70 year old student loves to look for the "right" sticker to put on her theory page!
Since the Ultimate Music Theory Beginner A, B and C books feature So-La and Ti-Do, I love to use the So-La and Ti-Do Sticker Pack so that my students can pick that extra special So-La or Ti-Do Sticker to show that they completed the Theory Page!
Another Tip is to use scissors to clip the bottom corner of each page when the front and back of that page is completed. This makes it super easy when opening the Music Theory Beginner A Workbook to find what page the Student is on.
Remember that each Student is different, unique and special. Some Students will "get" the concepts immediately and others will take a little while.
Did you notice in Karrington's Video that, when we were completing the exercise on Page 6, she "got" the directions immediately? Well, we spent part of our lesson learning how sounds go UP and go DOWN. The first time I played a going UP pattern, Karrington looked at me and said "Down?" in a questioning voice. She really did not "get it".
Instead of getting frustrated, we made a game of it. We stood at the keyboard and moved our bodies and our voices "UP" when we played going UP patterns and "DOWN" when we played going DOWN patterns.
We experimented on how it felt if our voices/bodies went "UP" on a going down pattern or "DOWN" on a going up pattern, and we talked about how it just didn't feel or sound right.
Can you see the confidence in her as she gives the answer to the Pattern Direction in the video? Yup - she most definitely "GOT IT"!
I am so excited about the Ultimate Music Theory Beginner A, B and C Series. I would love to hear about your experiences with your students too. Please feel free to comment below!
And remember - HAVE FUN!!!

Ultimate Music Theory Certification Course Online Teacher Training includes: 50 Video Sessions, All Materials, Online Support,
Exam Marking & Certificate!
Click HERE to discover what you will learn in the Ultimate Music Theory Certification Course. Your professional development Online Teacher Training starts here.
Keep on Learning... With a Smile and a Song!
Shelagh McKibbon-U'Ren


To help my students learn their thumbs are finger number 1, I have them learn “Thumb-one loves you.” This helps reinforce hearing rhymes, which also comes in handy when learning “space notes are FACE notes.”